A Landscape Photographer's Workflow
Photography is an odd craft. The way a pro does it is entirely different from how an amateur might do things. The way a pro does it is probably entirely different than most other pros do it too. I guess the only common denominator is that most people plan, execute, and publish photography in different ways, very in tune with their goals and desires out of the activity. Some people grab their camera before going on a casual walk, some people pull out their phone at the bowling alley, and some people might meticulously plan a shot for weeks or months. None of these are the right way to do it because we all have different goals. In this article I’m going to share how I plan out, execute and finalize most of my shoots to get results that I’m happy with.
If you are a seasoned photographer and have a scouting and shooting workflow, this article is NOT for you. No need to start any arguments on who's workflow is the best or most efficient. Everyone develops unique workflows tailored to their needs, and this is just my way.
Pick a Spot
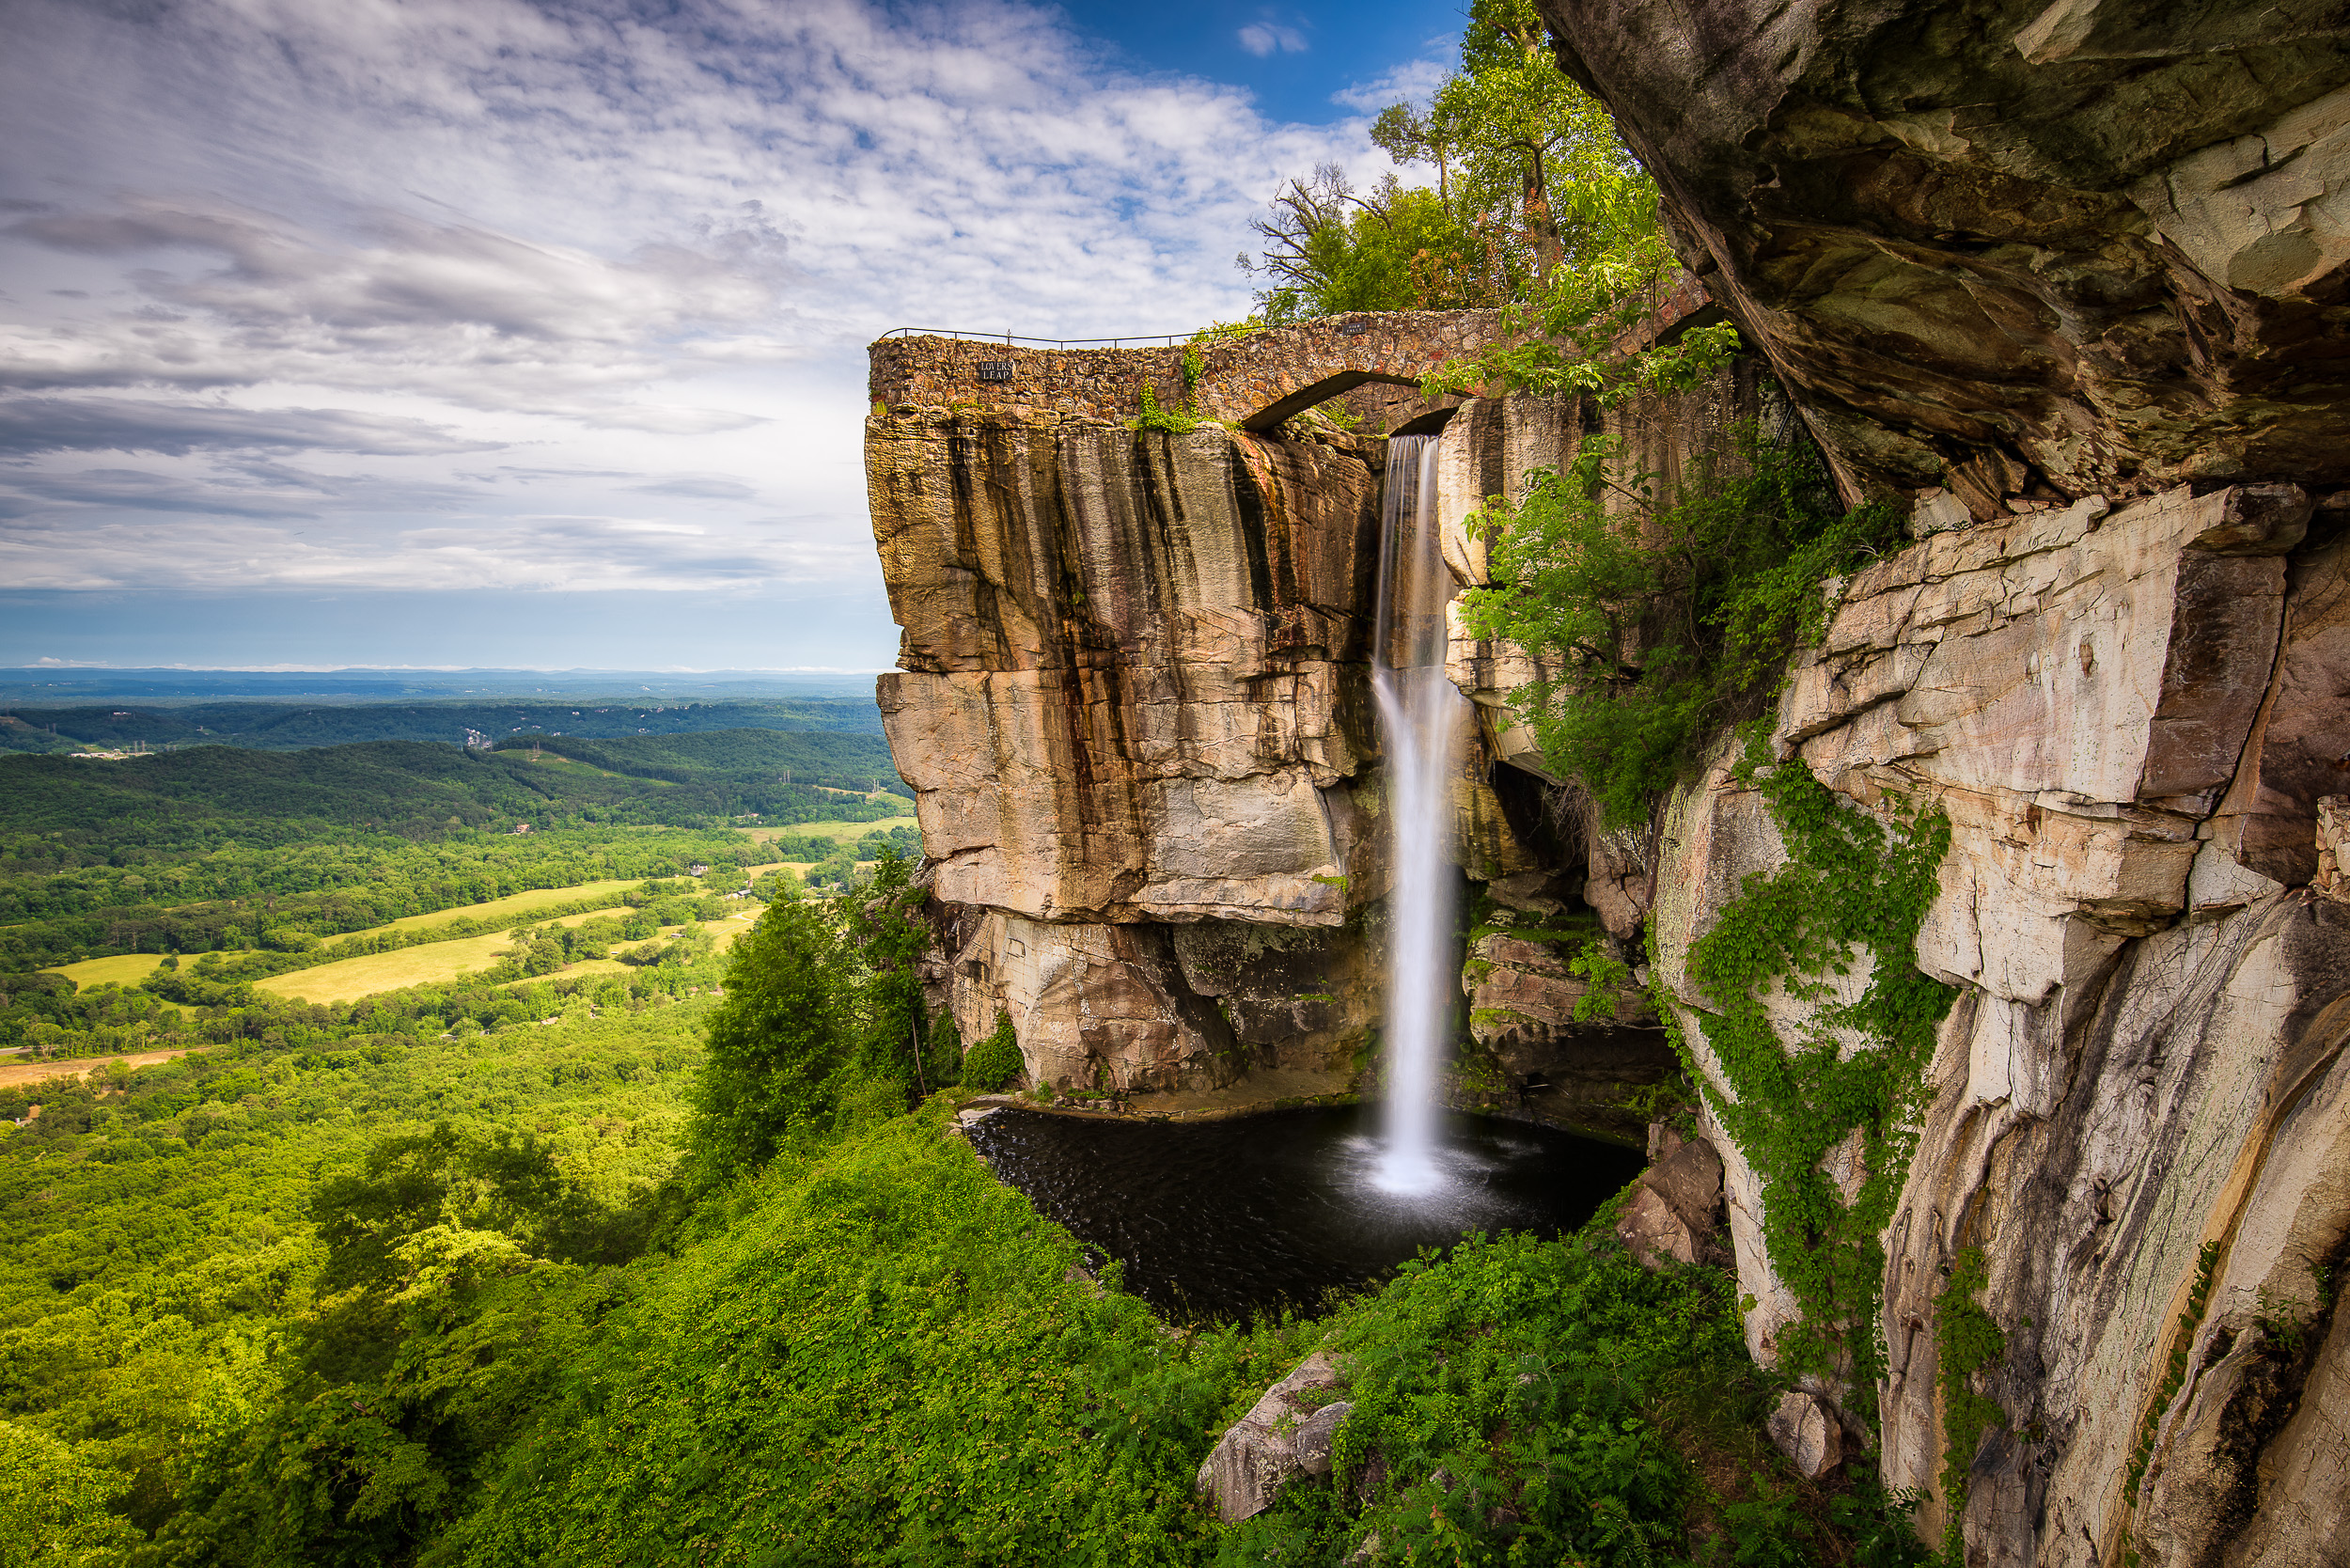
To me whether its near or far, the first step is to pick a spot that I want to take a photograph. This can usually happen one of two ways. 1) I see a picture of somewhere cool and say, “wow I need to go there” or 2) I look up something along the lines of “cool places near [blank]” on Google when I know I am in or will be in a specific area. Regardless of how far away the location is, whether you can walk, drive, or need to fly, the first step has to be deciding where to go. For example, when I stayed in Chatanooga, TN, I typed in “cool places near Chatanooga, TN” on Google images and found a picture of Rock City and I knew if I could shoot anywhere, that was it!
*Note: This article will not be a How-To for Travel Photography. Transportation, lodging, and the like are a completely different topic, perhaps for a different time.
Scouting
Digi-Scout
Digital Scouting is often the next step for me. After I choose where I want to go, I’ll run a few quick searches to try to find some potential compositions, determine when the light will be best, and just to find some overall inspiration. So, again sticking with the Chatanooga example, I learned that the viewpoint I wanted of the waterfall in Rock City would look best in late evening and most likely require a wide lens. I also knew a tripod would be a must (for the water) and I also found out that I had to pay to get in! Basically, gaining as much information about the site as possible prepares you to get to where you want to be when you want to be there.
Physical Scouting
Physical scouting gives you the opportunity to physically get to know your location (usually during mid-day), learn where parking is, which trails to take, what gear you’ll need, and where exactly you want to stand for the shot you want. Sometimes you won’t be able to physically scout somewhere, but if it’s nearby to your hometown or are really looking for a specific shot and have the time in an area, you can learn all the ins and outs of an area to know the best compositions, times of day, and weather patterns to know where you’ll need to be when the conditions are right.
Decide WHEN
Does your shot need a moody sky? Wispy clouds and blue sky? A rainy day? Gorgeous sunset or sunrise color? You get the point. After Digital Scouting (and Physical Scouting if possible), you need to decide what conditions and weather you will need for the shot you want. Ideally, you can wait for the perfect conditions over multiple days but sometimes you are only in an area for a day or even a couple hours in which case you get what you get.
On Location
They say you need to hear something 3 times to remember something so here it goes. Get there early. Get there early. Get there early. The reasons for this are twofold. Firstly, it takes the stress of running to location, scrambling to setup and get your shot composed when the light is already unfolding and instead, set up slowly, methodically, and relaxfully (which isn’t even a word). Secondly, it ensures that you’ll be the first person there (particularly important if it’s a classic shot in a touristy spot), which lets you set up and steal the best shot from the other photographers!
Now as far as setting up goes, there are a few main things to consider when setting up for a landscape shoot. These are generic workflow items that I use in 9/10 of my shoots. It is important to understand why your using the settings you use so you can change them when the situation calls for it.
Shoot RAW: Shooting raw future proofs your images and lets you get the most out of the highlights, shadows, colors and allows custom white-balance and profile settings.
ISO: Use the lowest NATIVE setting possible.
F-Stop: to get as sharp of images as possible with the best Depth of Field, the accepted rule of Thumb is stay around F8 or F11. I stay in Aperture Priority mode unless I want to also choose a specific shutter speed (blur water, freeze motion/wind, etc).
Bracket: I usually bracket my shots just in case there is an issue with the cameras metering system when I get them back on the computer.
Tripod and Interval Timer: Set-up on a solid tripod and use a 2-Second interval timer to limit camera shake.
Shoot THROUGHOUT THE TIME: You don’t know when the best light will start or end so shoot through the whole scene and decide which instant you like better back at your computer! If you don’t want to waste storage space, delete the ones you don’t need after the fact.
Back at the Office
I just got back from a great shoot at Rock City! What next? Next, I have to cull through the images, select my favorite/favorites to edit and share. After importing my pictures to Lightroom, I cull through them and star the images that I like best and then go through my standard editing process to bring out the best of the image! After I edit the pictures, I do a backup of the shoot to an external hard drive and cloud, clear my memory cards, charge my camera battery, and pack my bag to be ready for the next spontaneous trip.
SHARE/PRINT: Even though shooting for yourself is great, your computer isn’t the place for your images. Share them to Facebook, Instagram, Flickr, 500px or any other social media sites that you and your friends use. Additionally, and more importantly, if it’s a shot you absolutely LOVE, make a print! Your or a customer’s wall is the best place to display your pictures – it’s also becoming somewhat of a forgotten stage of the photographer’s workflow. Printing images large for myself or anyone else is my favorite thing about photography and is the most inspiring aspect of the craft to get me back out in the field.
Conclusion:
I’d love to hear what you think about my workflow! It’s not for everyone, it might not even be for anyone else but me, but I do think it’s a solid framework for landscape photographers. Some of it might seem pretty basic to seasoned photographers, but I hope that even just one aspiring beginner can take a couple tips and tricks from this article to improve their photography.
As usual, I’m an email or message away if you want any clarifications, have any suggestions, or just want to chat about some photography! So, until next time, get out there and make some pictures! (And here's the shot from Rock City.)